When it comes to storing cryptocurrencies, security should always be the top priority. With the rising number of hacks, phishing attacks, and data breaches, relying on exchanges or online wallets can put your digital assets at risk. This is where hardware wallets like Trezor come in. By visiting Trezor.io/start, users can set up their device quickly and begin managing their crypto with world-class security.
In this guide, we’ll cover everything you need to know about Trezor.io/start, from setting up your Trezor device to managing cryptocurrencies, ensuring maximum safety, and troubleshooting common issues.
What is Trezor.io/start?
Trezor.io/start is the official onboarding and setup page for Trezor hardware wallets. Whether you’ve purchased a Trezor Model One or a Trezor Model T, this page walks you through the installation, configuration, and usage process.
Instead of relying on third-party instructions or unverified sources, users should always begin with the official Trezor.io/start page. It provides:
-
Step-by-step setup instructions.
-
Firmware installation and updates.
-
Guides to create and manage recovery seeds.
-
Security tips for safe crypto storage.
-
Access to the Trezor Suite (the official wallet software).
Why Use Trezor for Crypto Security?
Before diving into the Trezor.io/start setup process, let’s briefly look at why Trezor is one of the most trusted hardware wallets in the crypto industry:
-
Offline Storage (Cold Wallet): Private keys are stored offline, making them immune to online hacks.
-
PIN & Passphrase Protection: Multiple layers of authentication prevent unauthorized access.
-
Open-Source Software: Transparent coding ensures security can be verified by anyone.
-
Multi-Currency Support: Trezor supports thousands of coins and tokens.
-
User-Friendly Interface: Integration with Trezor Suite makes managing crypto easy.
Simply put, Trezor is like a personal vault for your cryptocurrencies, ensuring you’re the only one with access to your digital wealth.
Getting Started at Trezor.io/start
When you first unbox your Trezor device, you’ll find:
-
The Trezor hardware wallet (Model One or Model T).
-
A USB cable.
-
Recovery seed cards.
-
User manual and quick-start guide.
Now, let’s walk through the setup process step by step:
Step 1: Go to Trezor.io/start
Open your browser and visit Trezor.io/start. This is the official page, so make sure you type the URL correctly to avoid phishing websites.
Step 2: Connect Your Device
-
Plug your Trezor device into your computer using the provided USB cable.
-
Depending on your model, the device will display a welcome screen.
Step 3: Install Trezor Suite
Trezor wallets are managed via the Trezor Suite application. At Trezor.io/start, you’ll find a download link for your operating system (Windows, macOS, Linux).
-
Download and install Trezor Suite.
-
Open the app and connect your device.
Trezor Suite provides an intuitive interface for sending, receiving, and managing cryptocurrencies securely.
Step 4: Install Firmware
When you connect your device for the first time, it will likely ask you to install the latest firmware.
-
Confirm the installation on your device.
-
Always ensure firmware updates are done only through Trezor.io/start or the Trezor Suite to avoid malicious versions.
Step 5: Create a New Wallet
Once the firmware is updated, you can choose to create a new wallet:
-
Click “Create New Wallet.”
-
Confirm the action on your Trezor device.
This step generates a new wallet and corresponding private keys stored inside your Trezor device.
Step 6: Backup Your Recovery Seed
This is the most important step of the process. Trezor will provide you with a 12- or 24-word recovery seed.
-
Write the words down on the provided recovery card.
-
Never take a photo or store it online.
-
Keep it in a safe, offline location (like a fireproof safe).
Your recovery seed is the master key to your wallet. If you lose your Trezor device, you can recover your funds with this seed.
Step 7: Set Up a PIN
For added security, set up a PIN code on your device. Each time you plug in your Trezor, you’ll need to enter this PIN to access your funds.
-
Use a unique, strong PIN.
-
Avoid simple combinations like “1234” or “0000.”
Step 8: Enable Additional Security (Optional)
Trezor allows you to enable passphrase protection, which works like a 25th word added to your recovery seed. Even if someone steals your recovery seed, they won’t be able to access your funds without the passphrase.
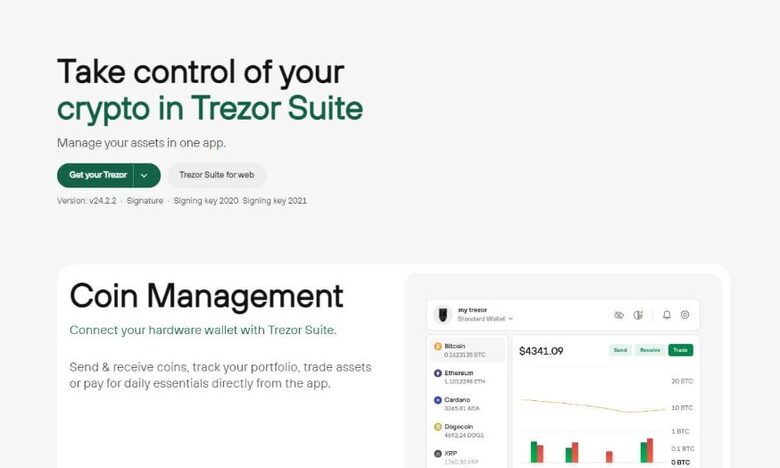
Using Trezor Suite After Setup
Once your device is set up via Trezor.io/start, you’ll primarily use Trezor Suite for managing cryptocurrencies.
Features of Trezor Suite:
-
Send & Receive Crypto: Easily transfer funds between wallets.
-
Portfolio Overview: View all your crypto assets in one dashboard.
-
Exchange Integration: Swap cryptocurrencies directly from the app.
-
Buy & Sell: Purchase crypto using fiat currency with integrated partners.
-
Enhanced Privacy: Options like Tor support help increase anonymity.
Supported Cryptocurrencies
Trezor supports over 1,000 cryptocurrencies, including:
-
Bitcoin (BTC)
-
Ethereum (ETH)
-
Litecoin (LTC)
-
Cardano (ADA)
-
Polkadot (DOT)
-
USDT, USDC, and other stablecoins
-
ERC-20 tokens and more
This makes it a versatile wallet for both beginners and advanced investors.
Common Mistakes to Avoid During Setup
When visiting Trezor.io/start, many beginners make simple errors that could put their funds at risk. Avoid these pitfalls:
-
Phishing Websites: Only use the official website (Trezor.io). Hackers create fake pages to steal recovery seeds.
-
Storing Recovery Seed Online: Never save it in your email, cloud storage, or computer. Always write it down offline.
-
Ignoring Firmware Updates: Updates fix vulnerabilities—always stay up-to-date.
-
Skipping PIN/Passphrase: These are extra layers of protection you should not ignore.
-
Buying from Unofficial Sources: Only purchase Trezor devices directly from trezor.io or authorized resellers to avoid tampered hardware.
Troubleshooting Issues at Trezor.io/start
Sometimes users encounter problems during setup. Here are common issues and fixes:
-
Device Not Recognized: Try a different USB cable/port or update your drivers.
-
Firmware Installation Fails: Reconnect the device and retry via Trezor Suite.
-
Forgotten PIN: Reset the device using your recovery seed.
-
Lost Recovery Seed: Unfortunately, without a seed, funds cannot be recovered—this is why proper backup is essential.
Why Trezor.io/start is Safer Than Exchanges
Many beginners leave their coins on exchanges like Binance or Coinbase. While convenient, this exposes funds to risks:
-
Exchanges can be hacked.
-
Governments can freeze accounts.
-
Private keys are not in your control.
With Trezor.io/start, you take control of your private keys. Not your keys, not your coins is a fundamental rule in crypto—and Trezor ensures your keys remain yours.
Final Thoughts
Trezor.io/start is the gateway to securing your cryptocurrency investments with one of the most trusted hardware wallets in the world. By following the setup steps carefully—installing firmware, backing up your recovery seed, creating a PIN, and enabling extra security features—you can protect your digital assets from hackers and unauthorized access.